 KOFA
Setup and usage
Installing KOFA and first-time setup
This guide covers installing the full KOFA and the first settings: where to get it, how to start it, what is where in the interface, and how to get to your first working vehicle. The screenshots were taken on a fresh installation (the interface language is Hungarian).
Note
You can also turn a finished graph into a smaller, standalone program that runs offline on the vehicle (for example on a Raspberry Pi): that is KOFA Lite. Set up the full KOFA first, because you export the Lite program from it.
What you get
KOFA consists of a server and a browser-based interface. Features are provided by Komod plugins (sensor, controller, camera, AI, display); you connect them on the Graph page, and the Dashboard shows the result.
| Concept | What it is | Where |
|---|---|---|
| Server | The program running on the machine (Windows, Raspberry Pi or any Linux). Komods and hardware run here. | the machine, http://<machine>:5080 |
| Interface | Opened from a browser; also installable as a PWA or a native app. | Access from elsewhere |
| Komod | A plugin: sensor, controller, display… Loaded at run time, can be switched off. | Komodok (Komods) page |
| Graph | The Komod instances and the typed links between them. | Gráf (Graph) page |
| Dashboard | The widgets of the active graph's Komods on a grid. | Dashboard page |
Which edition to choose
| Where you install | Good for | Hardware |
|---|---|---|
| Windows (developer edition) | Trying it out, building graphs, Komod development, next to the simulator. | simulated |
| Raspberry Pi 3/4 + Linux | The vehicle's on-board computer: I2C modules, camera, USB, Bluetooth, Wi-Fi hotspot. | real |
| Any Linux (x64, arm64) | Server, test machine. | real or simulated |
The installers and releases can be downloaded from kofa.kncsk.hu.
Installing on Windows
- Download the
KOFA-Setup-<version>-win-x64.exeinstaller and run it (administrator rights are required). - The wizard asks you to accept the license, then installs KOFA Developer (by default to
C:\Program Files\KOFA Developer). Data goes toC:\ProgramData\Kofaand is not removed on uninstall. - Start the KOFA Developer shortcut from the Start menu. A console window with the log opens, and the browser opens
http://localhost:5080.
Important
The console window is the KOFA server: KOFA runs as long as it is open. On first start, it prints the setup token into this window (see First start). If you closed the window, the restarted server prints the token again as long as there is no admin account.
The Windows edition is for development: hardware Komods (PCA9685, camera, INA219) run with simulated hardware, and Wi-Fi and Bluetooth management are simulated or unavailable.
Installing on a Raspberry Pi (Ubuntu Server / Raspberry Pi OS)
Preparation
- The recommended system is Ubuntu Server 24.04 LTS (64-bit) or Raspberry Pi OS Lite 64-bit (Bookworm). No desktop is needed.
- In the Raspberry Pi Imager settings (gear icon) set the host name, the user, SSH and, if needed, Wi-Fi.
- The package is self-contained: no .NET needs to be installed on the machine.
With one command (internet required)
curl -fsSL https://kofa.kncsk.hu/install-kofa.sh | sudo bash -s -- --lan
Manually, from the release package
Copy kofa-linux-arm64.tar.gz to the machine, unpack it and run the installer:
scp kofa-linux-arm64.tar.gz ubuntu@<machine>.local:/tmp/
ssh ubuntu@<machine>.local
cd /tmp && tar xzf kofa-linux-arm64.tar.gz
sudo ./linux-arm64/deploy/install.sh --lan
The installer creates the kofa system user, enables I2C, installs the Bluetooth packages, copies the program to /opt/kofa and starts the kofa systemd service. At the end it prints the address and the setup token.
| Option | Meaning |
|---|---|
| (none) | only http://localhost:5080 is reachable (meant to sit behind Caddy) |
--lan |
also reachable from the local network: http://<machine>:5080 |
--domain kofa.example.com |
installs Caddy with automatic HTTPS |
--network |
NetworkManager takes over Wi-Fi, which can then be managed from the interface (hotspot, connect) |
--hotspot <ssid>, --wifi <ssid>, --wifi-mode hotspot\|client |
initial network setup (see Network) |
--no-i2c, --no-bluetooth |
skip the I2C or the BlueZ step |
On Ubuntu, I2C is enabled in /boot/firmware/config.txt; after that the machine must be rebooted once. Detailed options, wiring and the network steps: docs/DEPLOY-rpi.md.
Where everything is after installation
| Location | Contents |
|---|---|
/opt/kofa |
the program (replaced on update) |
/etc/kofa/appsettings.json |
machine configuration: address, package folder, hardware backend |
/var/lib/kofa/kofa.db |
users and graphs (SQLite) |
/var/lib/kofa/komods/ |
uploaded Komods and those installed from the Komod store |
/var/lib/kofa/instances/ |
per-instance files (models, routes) |
Useful commands:
sudo systemctl status kofa          # is it running
journalctl -u kofa -f               # live log
journalctl -u kofa | grep "one-time token"   # the setup token
First start: creating the admin account
There is no default password. On first open, a fresh KOFA takes you to the Első indítás (First start) page.
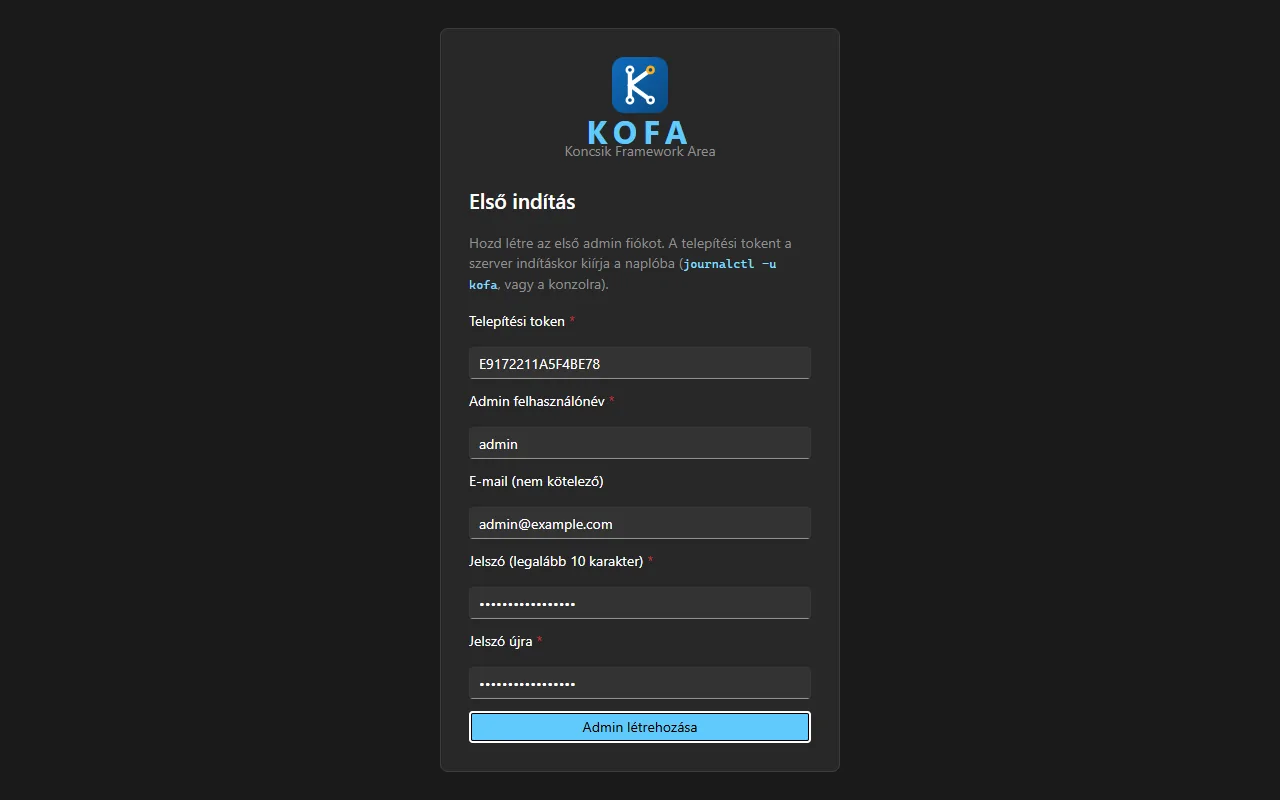
- Setup token: the server prints it into the log at start-up (on Windows into the console window, on Linux at the end of the installer and in
journalctl -u kofa). It is a one-time, 16-character code. - Admin user name and password (at least 10 characters, twice).
- E-mail: optional, but can be used to sign in.
- Click Admin létrehozása (Create admin): you are signed in right away.
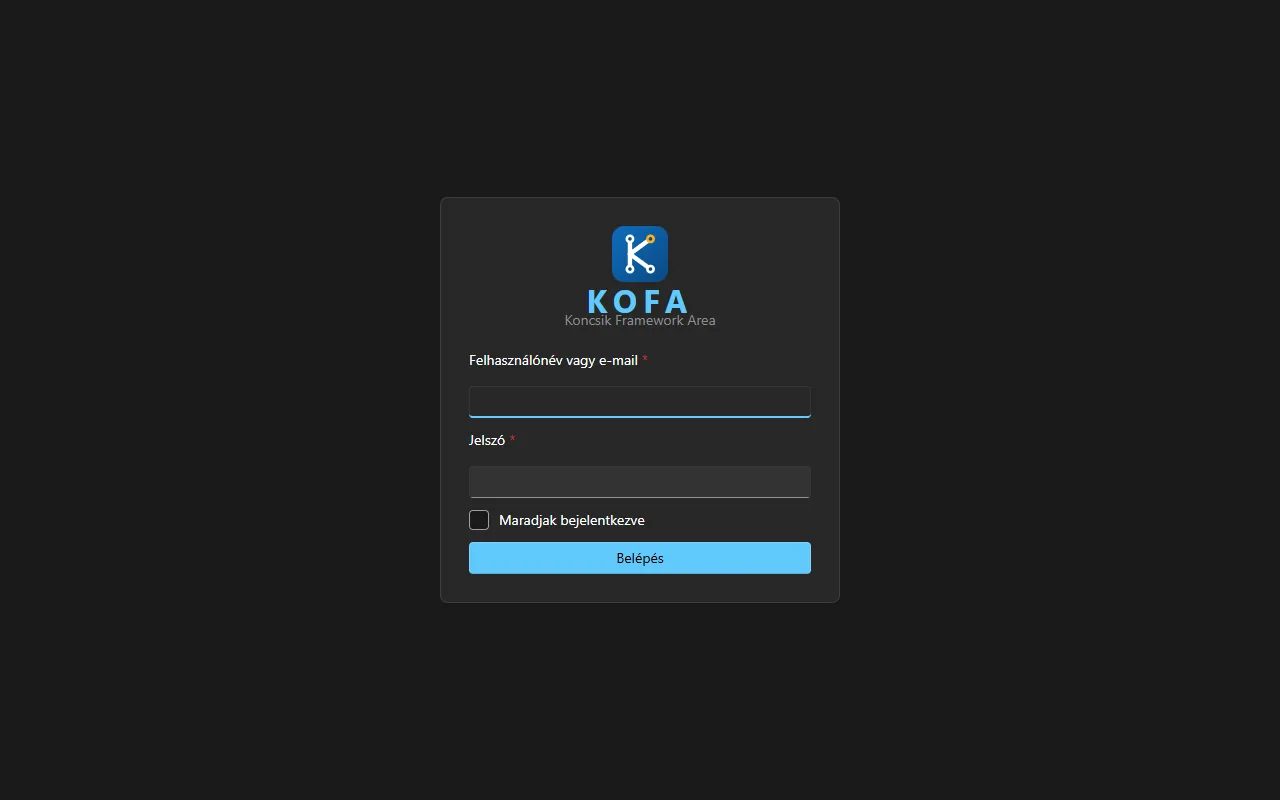
From then on, every sign-in happens on the sign-in page.
Important
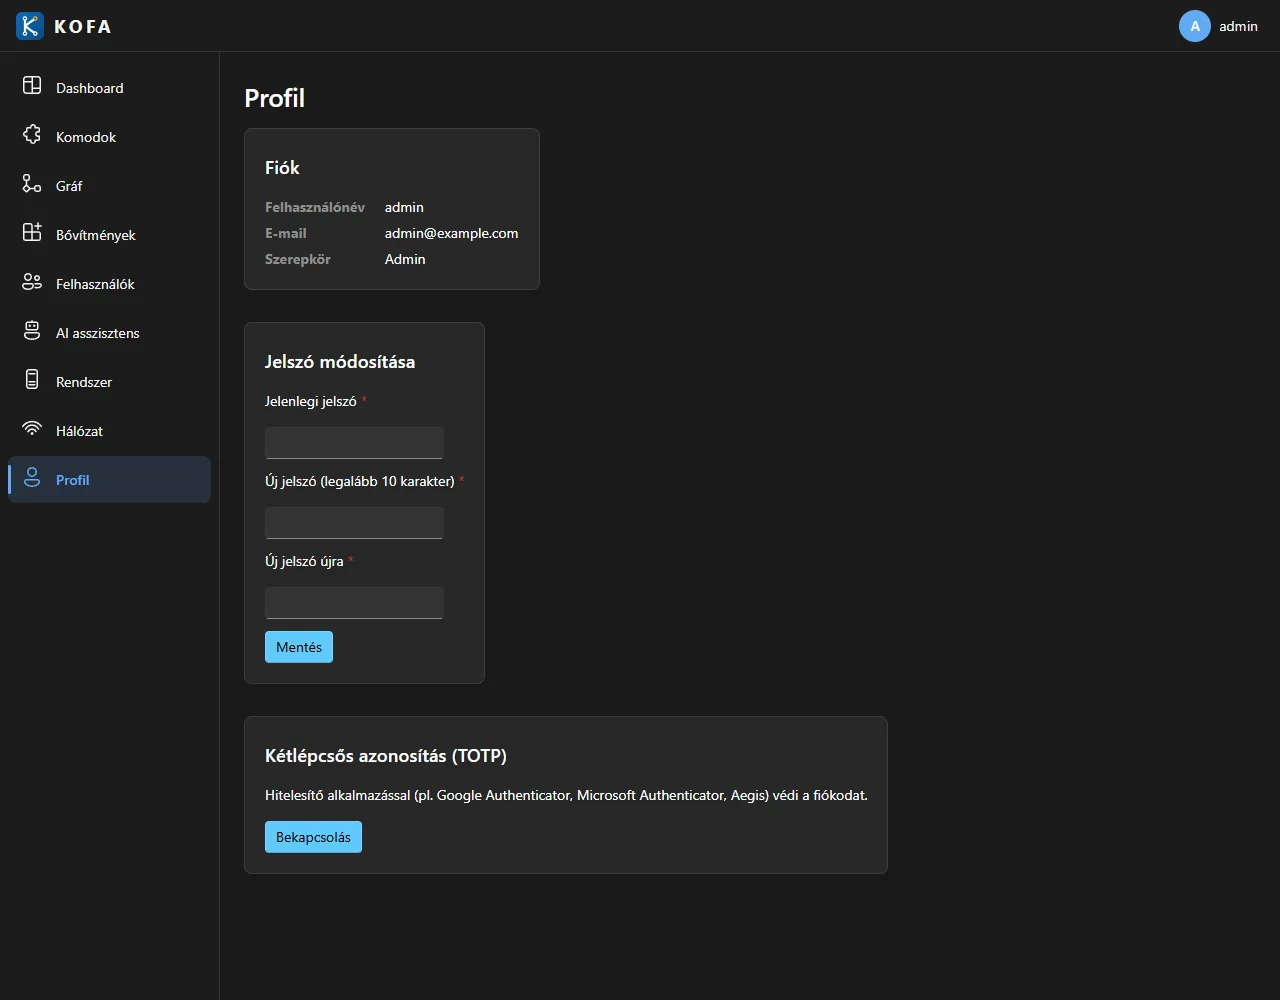
In production mode, two-factor authentication (TOTP) is mandatory for the admin. Turn it on under Profil → Kétlépcsős azonosítás: scan the QR code with an authenticator app (Microsoft/Google Authenticator, Aegis…), enter the code, and save the recovery codes, because without your phone they are the only way in.
The interface: what is where
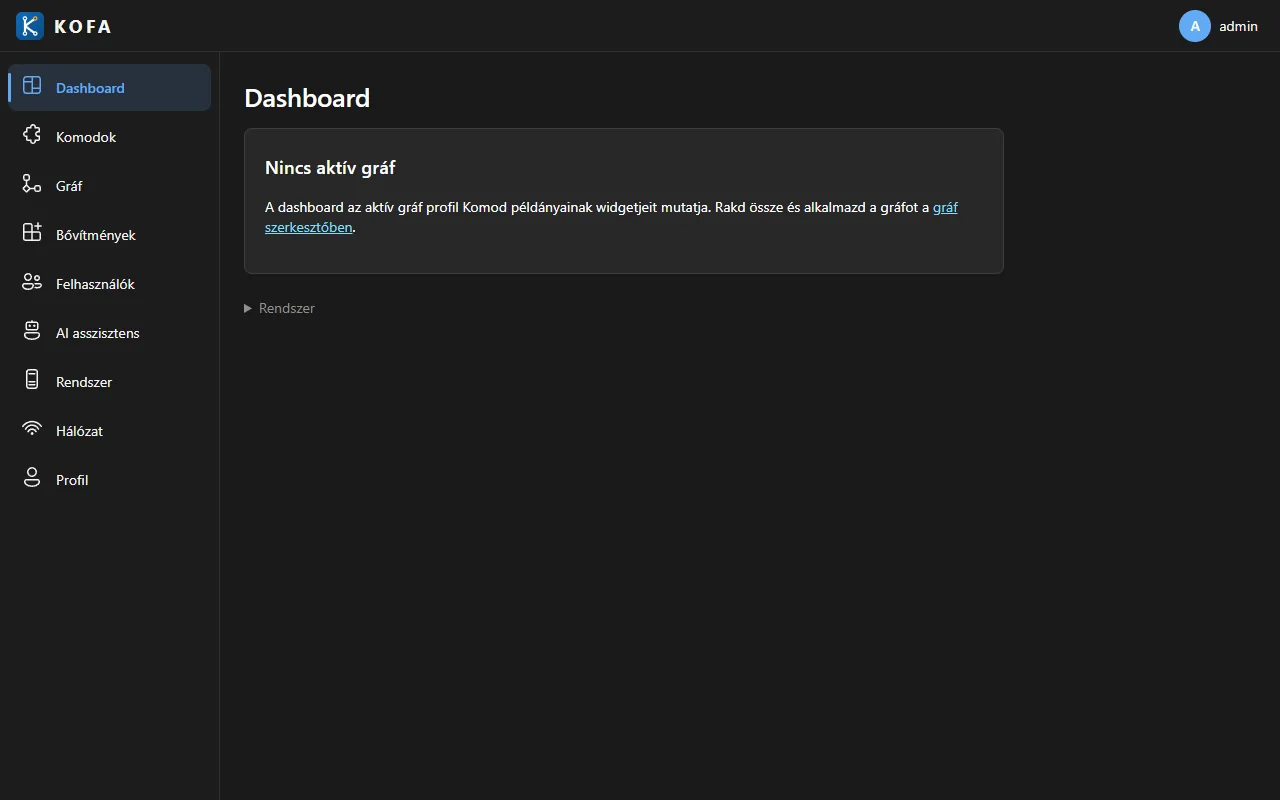
After signing in, use the menu on the left. An Admin sees everything; an Operator can edit graphs and drive the vehicle; a Viewer is read-only. The system, network and user management pages are for admins.
| Menu item | Purpose |
|---|---|
| Dashboard | The widgets of the active graph; the Elrendezés (Layout) button lets you move and resize them. |
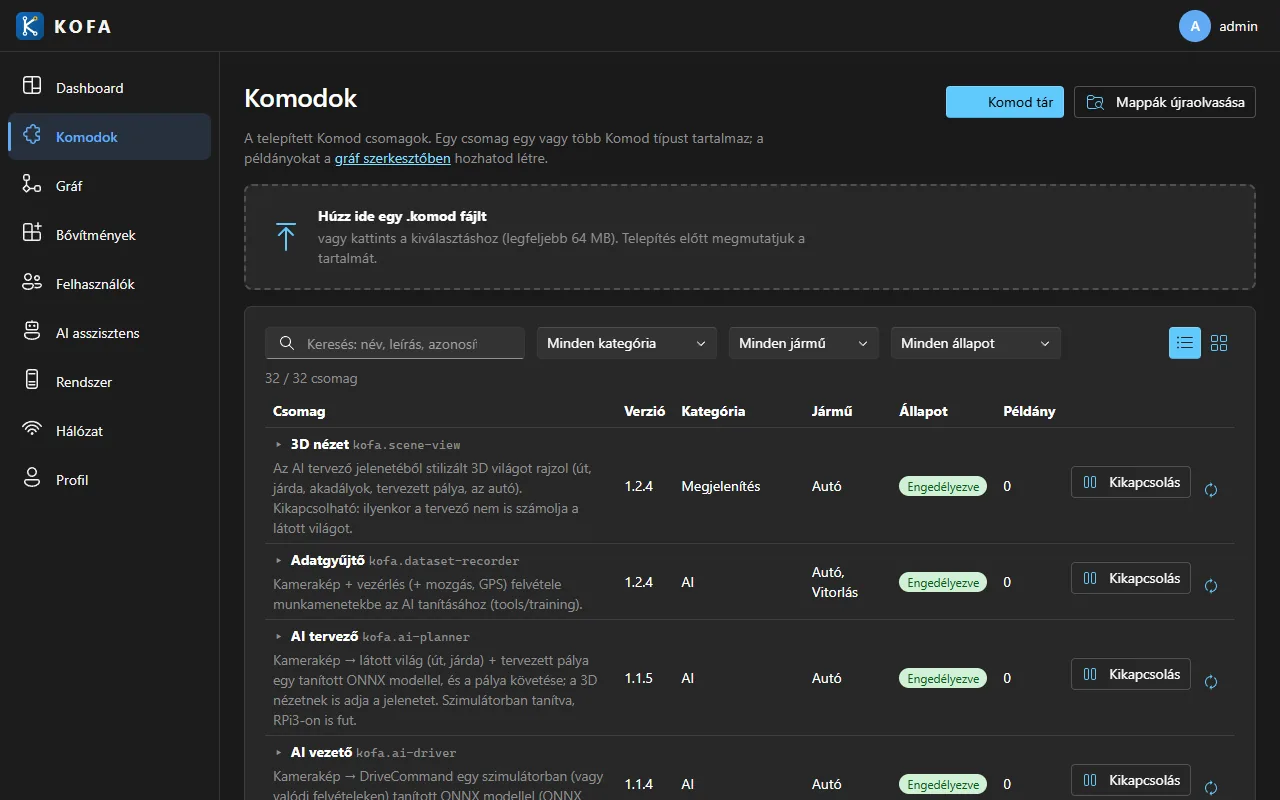
| Komodok (Komods) | The list of installed Komod packages; switch on/off, reload, upload a .komod file, the Komod store. |
| Gráf (Graph) | The editor of instances and links; this is where you activate the graph. You can also export it to a file or as a program. |
| Bővítmények (Extensions) | Add-ons running in the background (e.g. the Bluetooth connection). |
| Felhasználók (Users) | Accounts, roles, disabling. |
| AI asszisztens (AI assistant) | Setting up the MCP endpoint so an AI assistant (e.g. Claude Code) can build graphs and write Komods. |
| Rendszer (System) | Server details, updates, remote access (relay). |
| Hálózat (Network) | Wi-Fi, own hotspot, Bluetooth. |
| Profil (Profile) | Your own password, two-factor authentication. |
The Komodok page shows what is installed:
Installing Komods
In the Linux release package the Komods are not included: they are installed from the Komod store (kofa.kncsk.hu). Reading the store does not require signing in.
- Open Komodok → Komod tár (Komod store).
- Search by name, description or port type, and filter by category or vehicle.
- Before pressing Telepítés (Install) you can inspect the package contents; KOFA compares the downloaded file's checksum with the index.
- Update package by package or with the Mind frissítése (Update all) button.
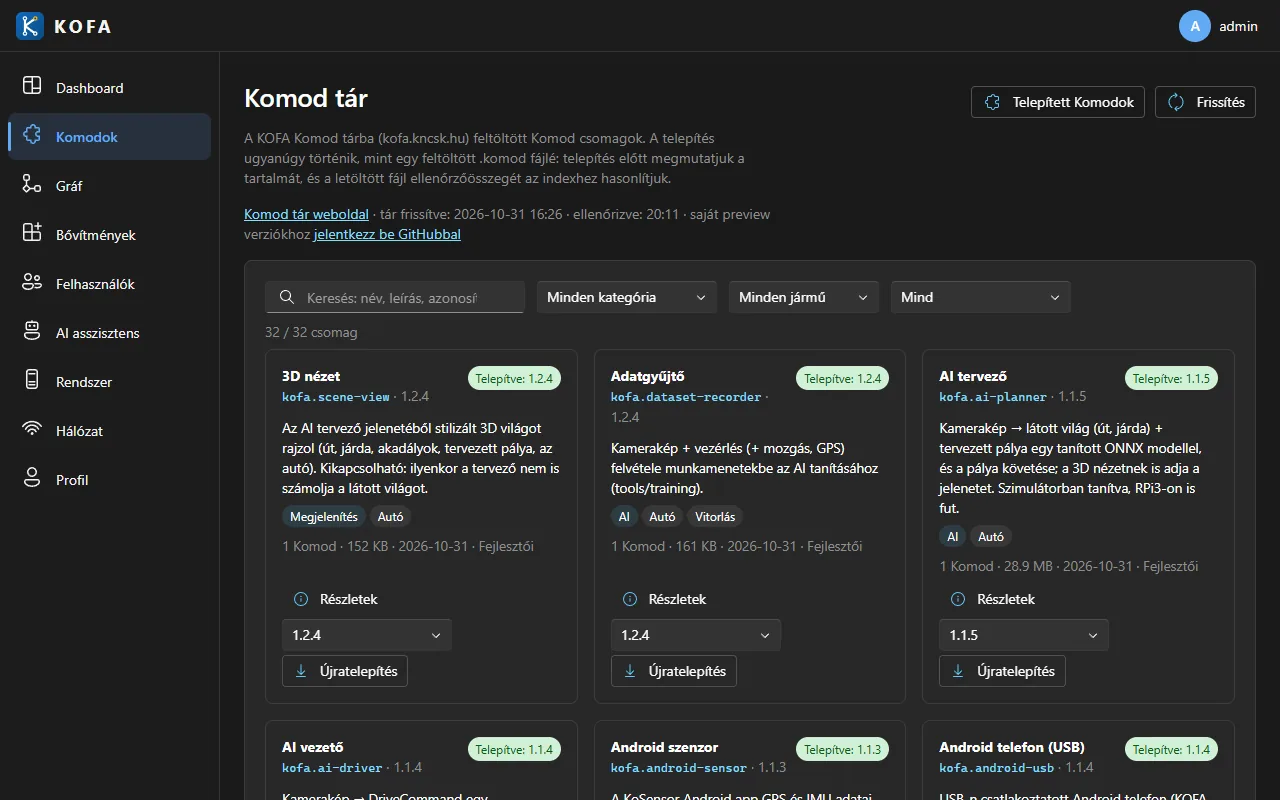
Packages from other sources (.komod files) can be installed by dropping them on the upload area of the Komodok page; KOFA shows the contents before installing. Writing your own Komod: Komod development.
Network: Wi-Fi, hotspot, Bluetooth
The Hálózat page (admin) manages the machine's Wi-Fi and Bluetooth adapter. On Linux, NetworkManager does the work: pass --network to the installer. (On Windows and development machines the page shows a simulated network.)
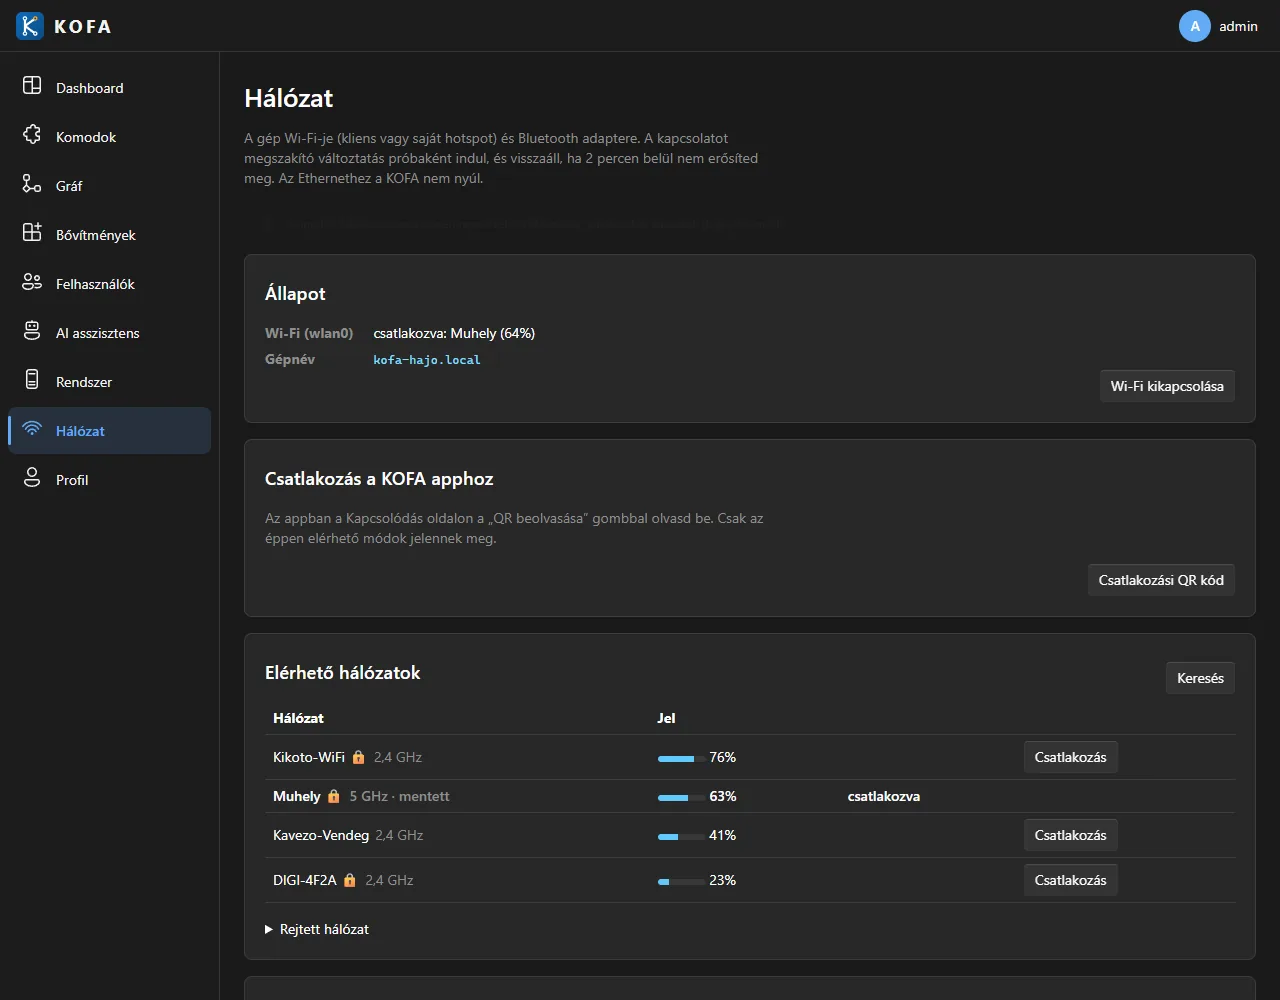
- Connect to another Wi-Fi (hidden networks too); order and removal of saved networks.
- Own hotspot: the machine shares Wi-Fi itself (SSID, password, band); a phone that joins reaches it at
10.42.0.1. Where there is no internet (on the water, at the track) this is the most common access. - Fallback hotspot: if the machine finds no known network at start-up, it starts a hotspot by itself.
- Connection QR code for the KOFA app.
Tip
Trial mode: anything that could break the connection (hotspot ↔ client switch, another network) starts as a trial. The page tells you in advance at which address you will be reachable; if you do not confirm within 2 minutes, the previous setting is restored. You cannot lock yourself out.
Your first graph
The graph is your vehicle's "wiring": Komod instances connected through typed ports (an output can only be linked to an input of the same type).
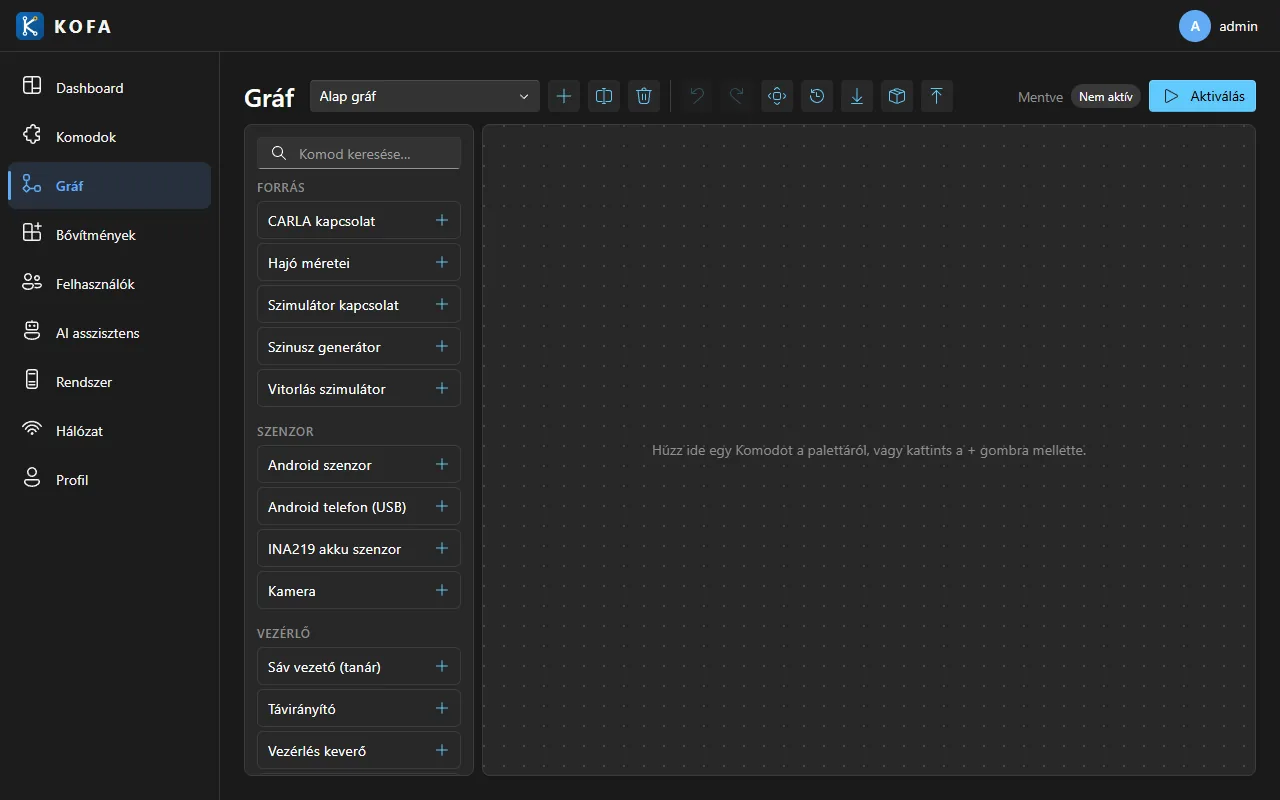
There are two ways to get a first graph:
- Import a ready example (recommended to start): the
examples/graphs/folder of the release and the repository contains ready profiles (car, sailboat, simulator and live variants). Choose the*.kofa-graph.jsonfile with the Import graph icon. The examples are also available on kofa.kncsk.hu, where you can build your own graph from them and from the Komods of the Komod store: Example graphs and the graph builder. The import always creates a new profile and warns about missing or differing Komod versions (install those from the Komod store first). - Build from scratch: put a Komod on the canvas from the palette with the + button or by dragging, then drag a link from an output (right side) to an input (left side). Click a node to edit its settings. Delete:
Delete.
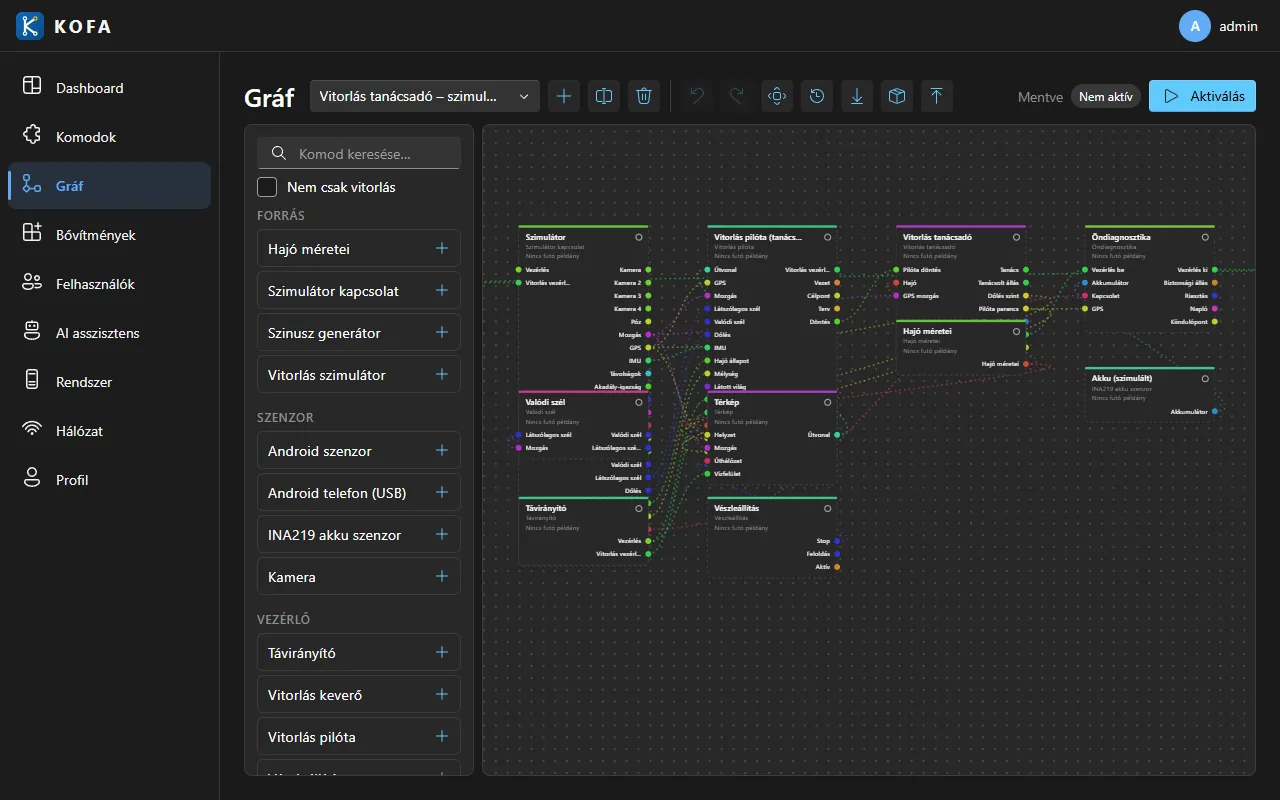
The icons of the editor's top row (from the left): profile selector, New profile, Rename / vehicle type, Delete profile, Undo and Redo, Fit all, Versions, Export to file, Export as program (KOFA Lite), Import graph.
Activation
The Aktiválás (Activate) button brings the graph to life. KOFA first shows the validation (errors, warnings) and the changes: which instances are created, which are removed, which links change. Activation replaces the graph that is running now with this one.
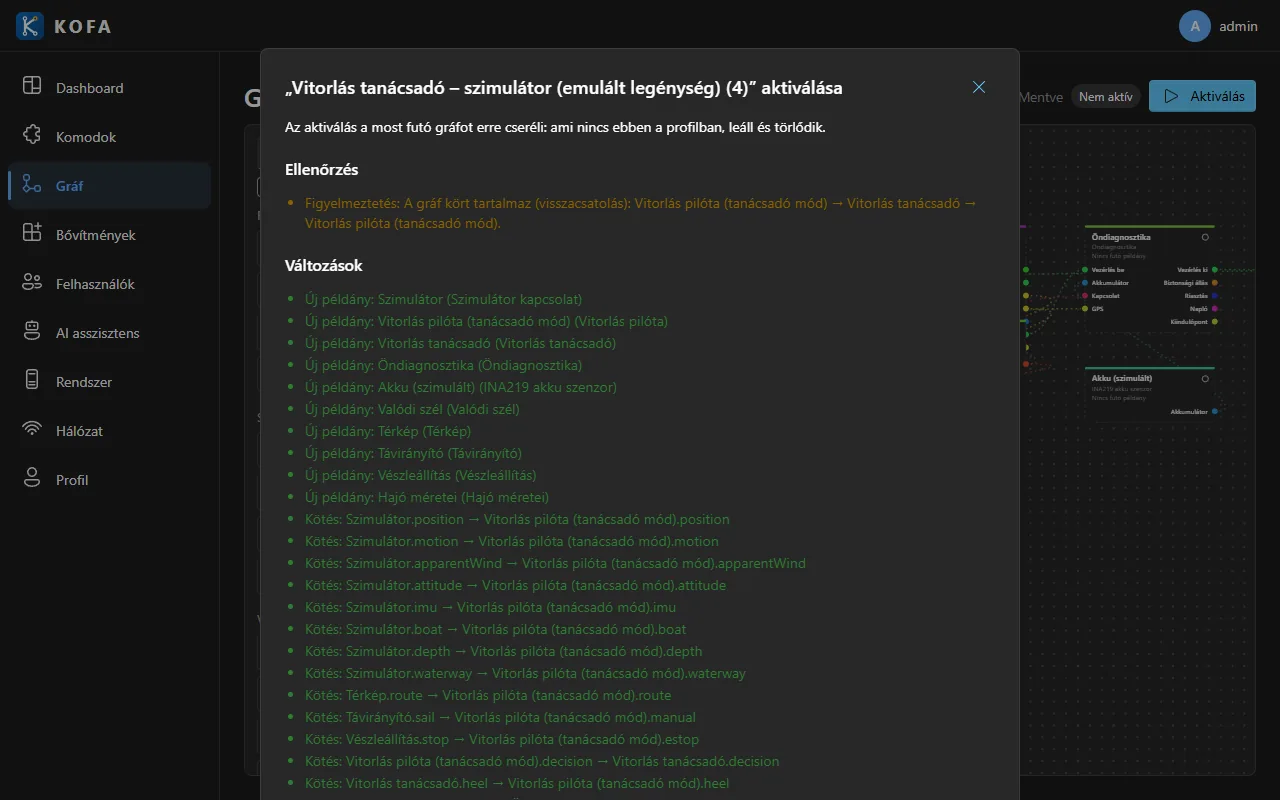
After activation, the button is replaced by the Alkalmazva (Applied) indicator and the Leállítás (Stop) button.
The dashboard
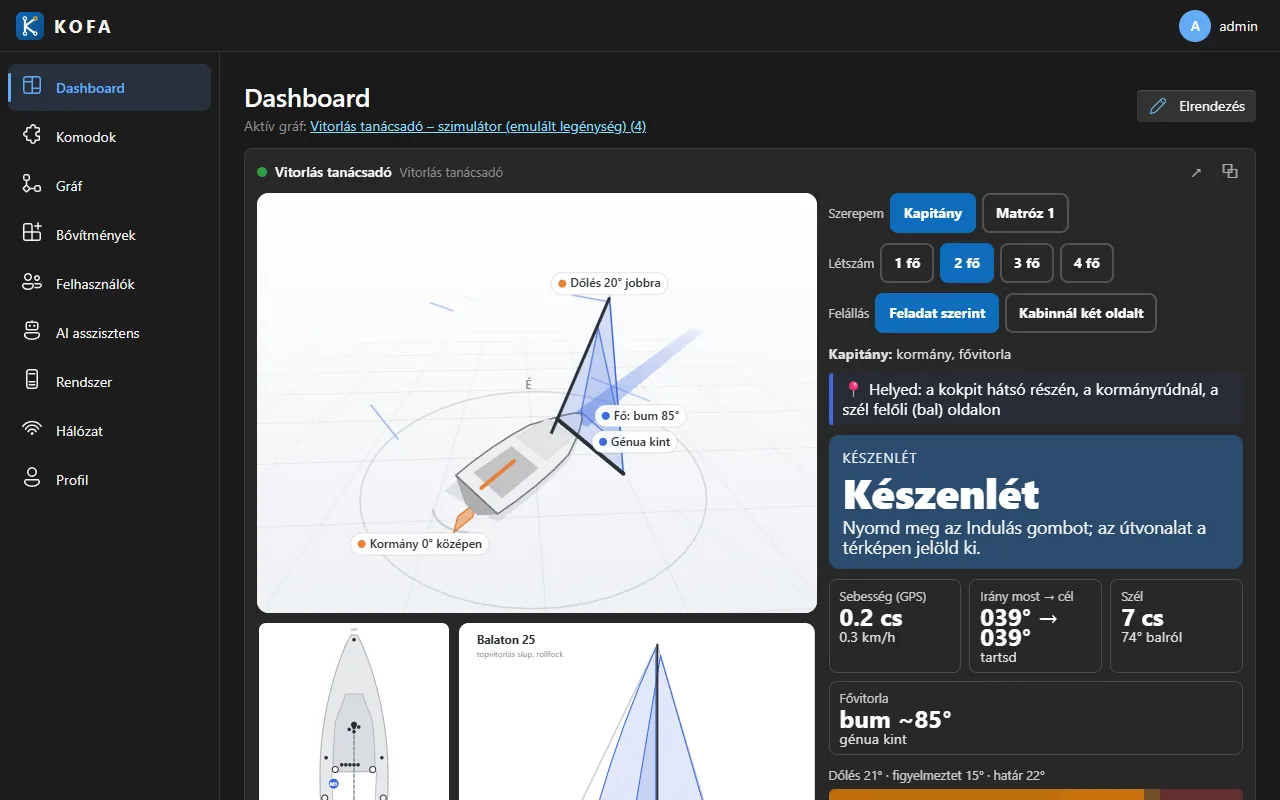
The Dashboard shows the widgets of the active graph's Komods. With the Elrendezés button the tiles can be moved by dragging and resized in both directions; the icons in a tile's header open the Komod's interface in a larger view or in a dialog window.
Users and roles
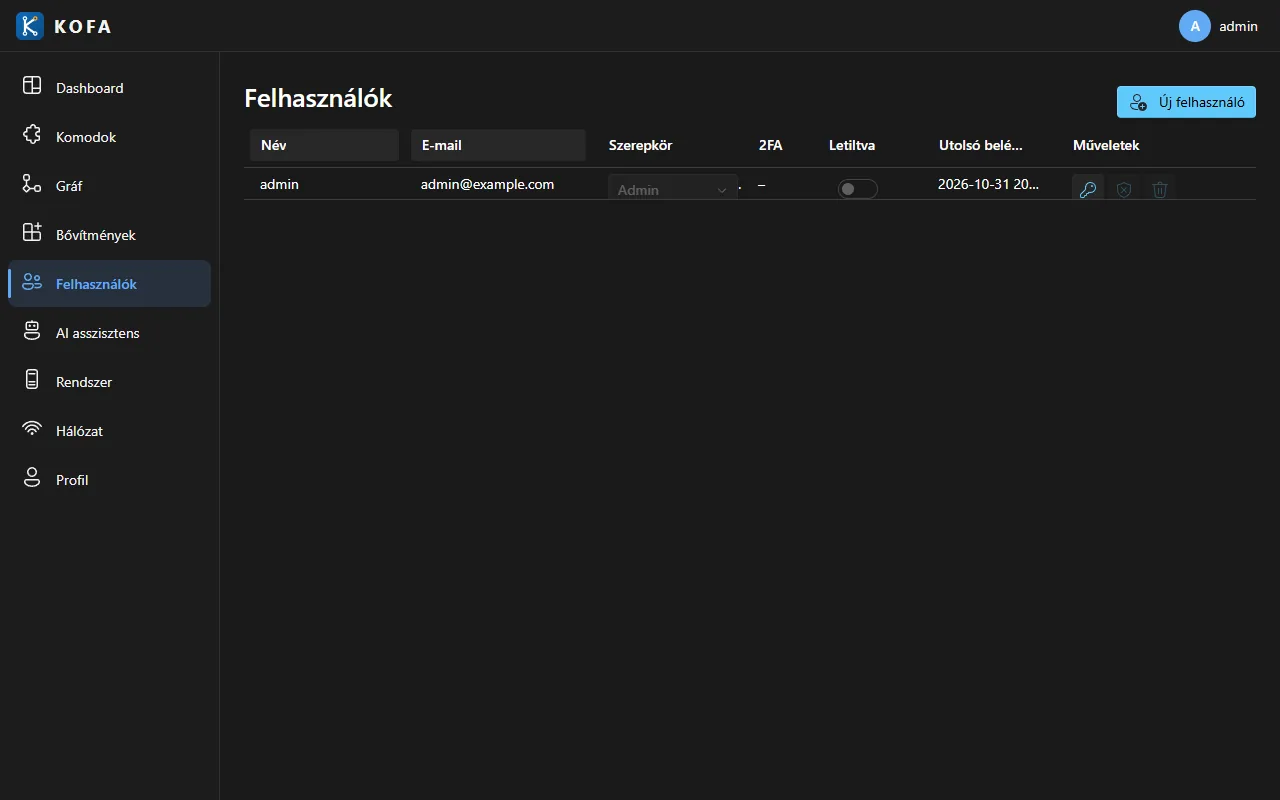
On the Felhasználók page (admin) you add further accounts. Roles:
| Role | What it can do |
|---|---|
| Admin | everything: installing Komods, users, system, network, terminal |
| Operator | editing graphs and driving the vehicle |
| Viewer | read-only |
Access from elsewhere
| Way | How |
|---|---|
| Local network | with the --lan install http://<machine>:5080, or http://<hostname>.local:5080 (mDNS). |
| Own hotspot | join the machine's Wi-Fi, then http://10.42.0.1:5080. |
| Internet, own domain | --domain install: Caddy + automatic HTTPS (forward ports 80 and 443 on the router to the machine). |
| Relay (behind NAT, over mobile data) | the Távoli elérés (relay) card on the Rendszer page: after pairing, the vehicle is reachable through your central KOFA account without opening a port. |
| PWA | Install in the browser (Chrome, Edge) or Add to home screen; the service worker only works under https:// or on localhost. |
| Native app | Windows, macOS, Android: after entering the server address, it signs in with a token. |
Backup and update
- Backup:
sudo systemctl stop kofa && sudo cp -a /var/lib/kofa ~/kofa-backup && sudo systemctl start kofa. - Update: on the Rendszer → Frissítés card (admin) with one button, or by re-running the one-line installer (
install-kofa.sh). The configuration (/etc/kofa) and data (/var/lib/kofa) are kept; on failure the previous version is restored. - Updating Komods: Komodok → Komod tár → Mind frissítése.
Troubleshooting
| Symptom | What to do |
|---|---|
| I cannot find the setup token | On Linux journalctl -u kofa \| grep "one-time token", on Windows in the console window. After the admin account is created, the token can no longer be used. |
| The page does not open from another machine | An install without --lan is only reachable on the machine itself. Run it again with --lan and check the firewall (port 5080). |
| A Komod is missing after import | Install the requested package (same or newer version) from the Komod store, then import again. |
/dev/i2c-1 does not exist |
On Ubuntu a reboot is needed after I2C is enabled. |
| I lost the admin password | On Linux, after stopping the kofa service, deleting the database (/var/lib/kofa/kofa.db) gives a new setup token, but users and graphs are lost too: back up first. |
| A Komod misbehaves | Komodok page: reload (hot reload) or switch it off; see the log with journalctl -u kofa. |
More: Troubleshooting.
Next steps
- Make an offline program for the vehicle from your graph: KOFA Lite.
- Write your own Komod: First Komods (tutorial).